A Small Collection of NodeMCU Lua Scripts
By limpkin on Sunday, April 17 2016, 14:51 - My Projects - Permalink
I usually never use libraries... but made an exception for these quick projects !
I'm pretty sure that most people reading this very article know about the (very) cheap ESP8266 Wifi module.
A bit more than a year ago, I actually made a small development board for it, which was recently used in the connected lamp that wakes me up. While what follows pales in comparison to what cnlohr has implemented on this chip over the last months, sometimes you just have small projects that you don't want to spent days on.
Anyway, the 'standard' way of compiling programs for this neat little chip involves installing a cross-compiling toolchain on a Linux computer (or VM), and then using a dedicated tool to flash your program to the ESP8266.
As you can guess, this can quickly get tiring if all you want to do is blink an LED... but then I stumbled upon NodeMCU and Domoticz.
Getting Started with NodeMCU
NodeMCU is an open-source firmware and development kit that helps electronics enthusiasts to prototype IoT products within a few Lua script lines. Concretely, it is a firmware you can flash to any ESP8266 board, which will then interpret a text file which contains your commands. And while you won't find many websites detailing nodeMCU based projects, it is very convenient when the program you want to make only contains a few actions.
So let's imagine you have one ESP8266 development board laying around to which you want to connect a sensor. Let's also imagine you don't want to use any Linux tool and want to have everything working as soon as possible. Getting NodeMCU on your board is as simple as:
- Generating your own NodeMCU build and selecting the libraries you want included in it
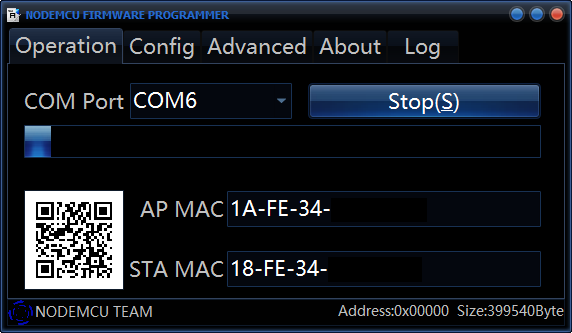
- Downloading NodeMCU Flasher and using it to flash the firmware you received in the previous step
- Downloading ESP8266 Lua Loader and using it to send your future Lua Scripts
What you need to know about NodeMCU
As previously mentioned, the NodeMCU firmware running on your ESP8266 will simply run Lua scripts stored in the ESP8266 Flash. The NodeMCU libraries documentation may be found here.
When the platform first boots, it will try to start a file named init.lua which in our case will contain the commands to connect to our wifi network and start our main script:
--init.lua
wifi.setmode(wifi.STATION)
wifi.sta.config("mywifinetworkname","mywifinetworkpassword")
wifi.sta.connect()
tmr.alarm(1, 1000, 1, function()
	if wifi.sta.getip() == nil then
		print("IP unavaiable, Waiting...")
	else
		tmr.stop(1)
		print("ESP8266 mode is: " .. wifi.getmode())
		print("The module MAC address is: " .. wifi.ap.getmac())
		print("Config done, IP is "..wifi.sta.getip())
		dofile ("domoticz.lua")
	end
end)
The Domoticz Platform
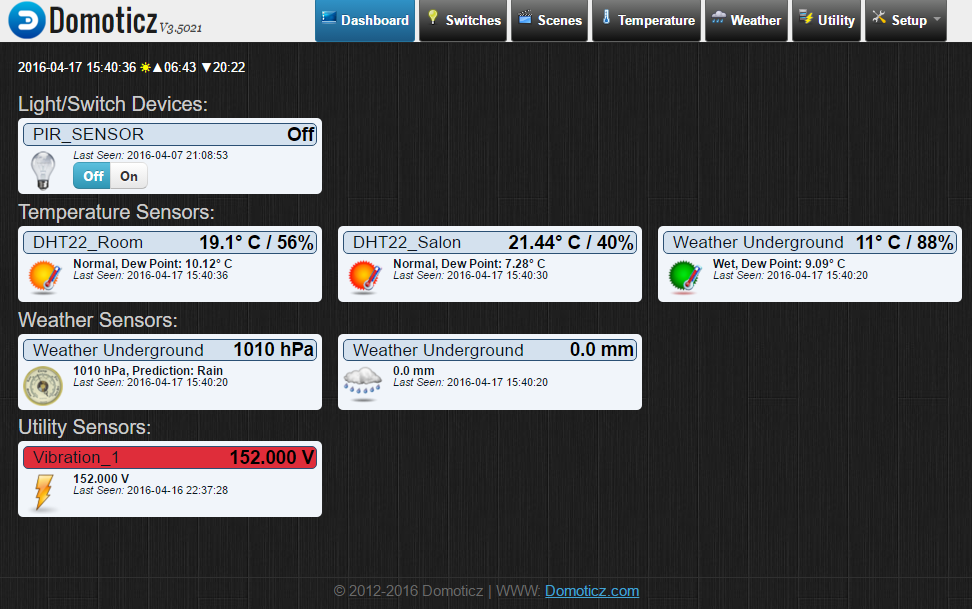
Getting data isn't particularly useful if it can't correctly be stored and displayed to the user.
Domoticz is a Home Automation System that lets anyone monitor and configure various devices like lights, switches, various sensors/meters like temperature, rain, wind, UV and much more. It is open source, can be installed on Linux, Windows and embedded devices.
In my case I had it installed on my usbarmory and could access it in my browser in less than 10 minutes. You'll find Domoticz main user manual here.
As a side note, I was very impressed to see how many devices Domoticz supports, while not neglecting the security aspects that comes with connecting sensors and lights to your local network.
First Small Project: PIR Sensor
In the Domoticz interface, simply add a virtual device of "light/switch" type and use this domoticz.lua script:
--domoticz.lua
pin = PIRSENSOR_PIN
last_state = 1
gpio.mode(pin, gpio.INPUT)
tmr.alarm(0,100, 1, function()
if gpio.read(pin) ~= last_state then
last_state = gpio.read(pin)
conn = net.createConnection(net.TCP, 0)
conn:connect(8080,"YOURSERVERIP")
conn:on("receive", function(conn, payload) end)
conn:on("connection", function(conn, payload)
if last_state == 1 then
conn:send("GET /json.htm?type=command¶m=switchlight&idx=YOURSENSORIDX&switchcmd=Set%20Level&level=10"
.." HTTP/1.1\r\n"
.."Host: 127.0.0.1:8080\r\n"
.."Connection: close\r\n"
.."Accept: */*\r\n"
.."User-Agent: Mozilla/4.0 (compatible; esp8266 Lua; Windows NT 5.1)\r\n"
.."\r\n")
print("ON")
else
conn:send("GET /json.htm?type=command¶m=switchlight&idx=YOURSENSORIDX&switchcmd=Set%20Level&level=0"
.." HTTP/1.1\r\n"
.."Host: 127.0.0.1:8080\r\n"
.."Connection: close\r\n"
.."Accept: */*\r\n"
.."User-Agent: Mozilla/4.0 (compatible; esp8266 Lua; Windows NT 5.1)\r\n"
.."\r\n")
print("OFF")
end
end)
conn:on("disconnection", function(conn, payload) end)
end
end)
I won't explain the electrical wiring part of things as I'm fairly sure you can figure that out ;-) .
You'll however need and find the ESP8266 pin number to nodemcu pin number look up table here.
Second Small Project: DHT22 Temp & Humidity Sensor
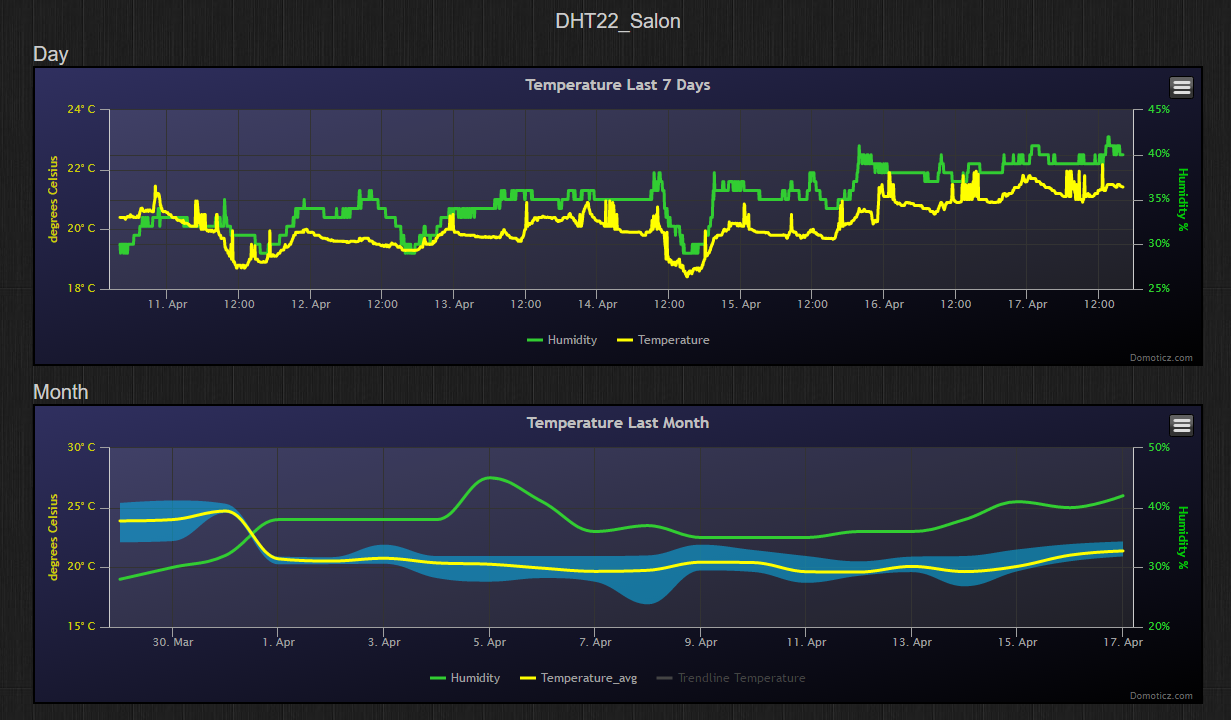
The days are getting warmer and you can notice it indoors!
By connecting a DHT22 to your ESP8266 and strategically placing your platform (not like me) you can get the kind of graph above. Here's the Lua script:
--domoticz.lua
pin = 5
temp_to_send = 0
hum_to_send = 0
aggregate_hum = 0
aggregate_temp = 0
aggregate_counter = 0
status, temp, humi, temp_dec, humi_dec = dht.read(pin)
if status == dht.OK then
tmr.alarm(0,500, 1, function()
status, temp, humi, temp_dec, humi_dec = dht.read(5)
if status == dht.OK then
aggregate_counter = aggregate_counter + 1
aggregate_hum = aggregate_hum + ((math.floor(humi)*1000) + humi_dec)
aggregate_temp = aggregate_temp + ((math.floor(temp)*1000) + temp_dec)
if aggregate_counter == 20 then
temp_to_send = aggregate_temp/20
hum_to_send = aggregate_hum/20
aggregate_hum = 0
aggregate_temp = 0
aggregate_counter = 0
conn=net.createConnection(net.TCP, 0)
conn:connect(8080,"YOURSERVERIP")
conn:on("receive", function(conn, payload) end)
conn:on("connection", function(conn, payload)
conn:send("GET /json.htm?type=command¶m=udevice&idx=YOURSENSORIDX&nvalue=0&svalue=" .. string.format("%d.%d;%d.%d;0", temp_to_send/1000, temp_to_send%1000, hum_to_send/1000, hum_to_send%1000)
.." HTTP/1.1\r\n"
.."Host: 127.0.0.1:8080\r\n"
.."Connection: close\r\n"
.."Accept: */*\r\n"
.."User-Agent: Mozilla/4.0 (compatible; esp8266 Lua; Windows NT 5.1)\r\n"
.."\r\n")
--print("http://YOURSERVERIP:8080/json.htm?type=command¶m=udevice&idx=YOURSENSORIDX&nvalue=0&svalue=" .. string.format("%d.%03d;%d.%03d;0", math.floor(temp), temp_dec, math.floor(humi), humi_dec))
print(string.format("DHT Temperature:%d.%d Humidity:%d.%d\r\n", temp_to_send/1000, temp_to_send%1000, hum_to_send/1000, hum_to_send%1000))
end)
conn:on("disconnection", function(conn, payload) end)
end
end
end)
elseif status == dht.ERROR_CHECKSUM then
print( "DHT Checksum error." )
elseif status == dht.ERROR_TIMEOUT then
print( "DHT timed out." )
end
A few things to note here:
- some averaging was required to get consistent readings with the DHT22
- this particular LUA script uses an integer NodeMCU build
Third Small Project: Sleep Cycle Monitor
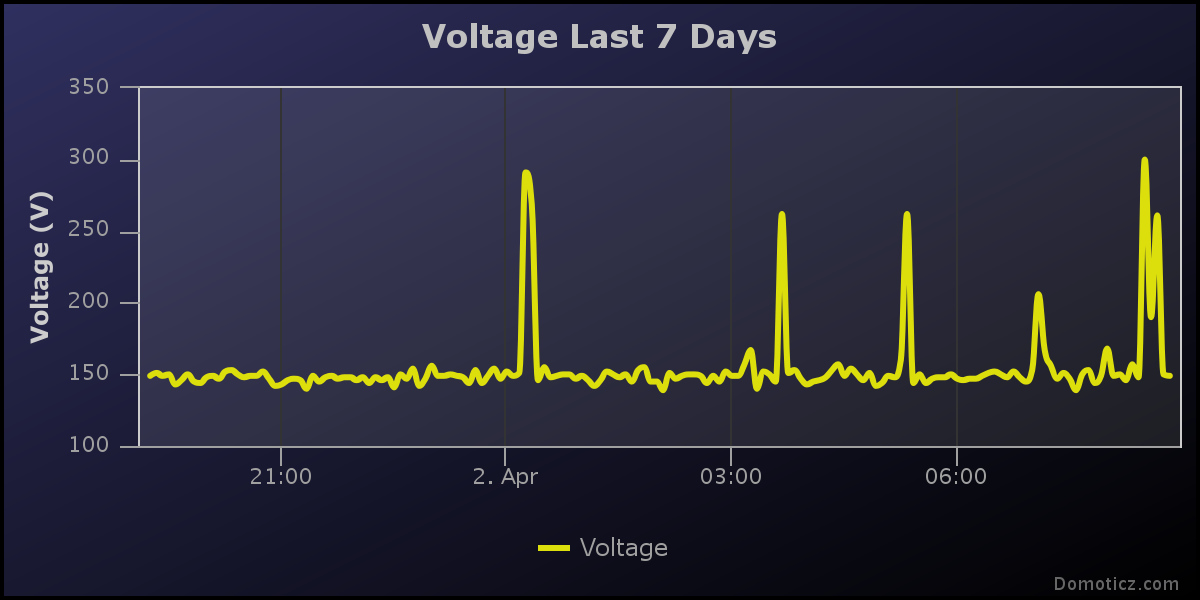
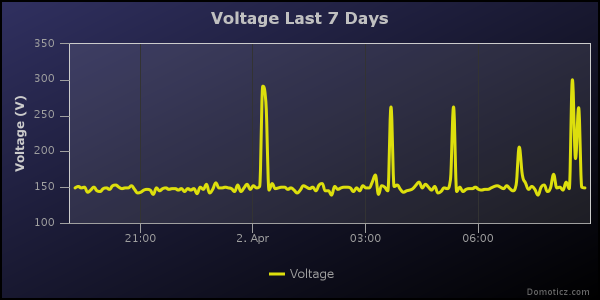
Unfortunately Domoticz doesn't have a vibration sensor type, but can you still notice the REM cycles?
This graph can simply be generated by connecting an MPU6050 3 axis gyroscope + accelerometer to the ESP8266 and using that (big) script:
--domoticz.lua
sda, scl = 5, 7
avg_x = 0
avg_y = 0
avg_z = 0
report_data = 0
aggregate_counter = 0
bigger_aggregate_counter = 0
aggregate_ax_val = 0
aggregate_ay_val = 0
aggregate_az_val = 0
bigger_aggregate_ax_val = 0
bigger_aggregate_ay_val = 0
bigger_aggregate_az_val = 0
aggregate_abs_ax_val = 0
aggregate_abs_ay_val = 0
aggregate_abs_az_val = 0
function write_reg_MPU(reg,val)
i2c.start(0)
i2c.address(0, 0x68, i2c.TRANSMITTER)
i2c.write(0, reg)
i2c.write(0, val)
i2c.stop(0)
end
function read_reg_MPU(reg)
i2c.start(0)
i2c.address(0, 0x68, i2c.TRANSMITTER)
i2c.write(0, reg)
i2c.stop(0)
i2c.start(0)
i2c.address(0, 0x68, i2c.RECEIVER)
c=i2c.read(0, 1)
i2c.stop(0)
--print(string.byte(c, 1))
return c
end
function new_data_interrupt()
-- clear interrupt
read_reg_MPU(58)
-- read acceleration data
i2c.start(0)
i2c.address(0, 0x68, i2c.TRANSMITTER)
i2c.write(0, 59)
i2c.stop(0)
i2c.start(0)
i2c.address(0, 0x68, i2c.RECEIVER)
c=i2c.read(0, 8)
i2c.stop(0)
Ax=bit.lshift(string.byte(c, 1), 8) + string.byte(c, 2)
Ay=bit.lshift(string.byte(c, 3), 8) + string.byte(c, 4)
Az=bit.lshift(string.byte(c, 5), 8) + string.byte(c, 6)
temperature=bit.lshift(string.byte(c, 7), 8) + string.byte(c, 8)
if (Ax > 0x7FFF) then
Ax = Ax - 0x10000;
end
if (Ay > 0x7FFF) then
Ay = Ay - 0x10000;
end
if (Az > 0x7FFF) then
Az = Az - 0x10000;
end
if (temperature > 0x7FFF) then
temperature = temperature - 0x10000;
end
temperature = (temperature*100 / 340) + 3653 -- /100
-- data aggregation
aggregate_ax_val = aggregate_ax_val + Ax
aggregate_ay_val = aggregate_ay_val + Ay
aggregate_az_val = aggregate_az_val + Az
aggregate_counter = aggregate_counter + 1
if (Az - avg_z) < 0 then
aggregate_abs_az_val = aggregate_abs_az_val - Az + avg_z
else
aggregate_abs_az_val = aggregate_abs_az_val + Az - avg_z
end
if (Ay - avg_y) < 0 then
aggregate_abs_ay_val = aggregate_abs_ay_val - Ay + avg_y
else
aggregate_abs_ay_val = aggregate_abs_ay_val + Ay - avg_y
end
if (Ax - avg_x) < 0 then
aggregate_abs_ax_val = aggregate_abs_ax_val - Ax + avg_x
else
aggregate_abs_ax_val = aggregate_abs_ax_val + Ax - avg_x
end
end
function second_timer()
if aggregate_counter > 20 then
report_data = (aggregate_abs_ax_val+aggregate_abs_ay_val+aggregate_abs_az_val)/(aggregate_counter)
bigger_aggregate_az_val = bigger_aggregate_az_val + (aggregate_az_val/aggregate_counter)
bigger_aggregate_ay_val = bigger_aggregate_ay_val + (aggregate_ay_val/aggregate_counter)
bigger_aggregate_ax_val = bigger_aggregate_ax_val + (aggregate_ax_val/aggregate_counter)
bigger_aggregate_counter = bigger_aggregate_counter + 1
if avg_z ~= 0 then
conn=net.createConnection(net.TCP, 0)
conn:connect(8080,"YOURSERVERIP")
conn:on("receive", function(conn, payload) end)
conn:on("connection", function(conn, payload)
conn:send("GET /json.htm?type=command¶m=udevice&idx=YOURSENSORIDX&nvalue=0&svalue=" .. string.format("%d",report_data)
.." HTTP/1.1\r\n"
.."Host: 127.0.0.1:8080\r\n"
.."Connection: close\r\n"
.."Accept: */*\r\n"
.."User-Agent: Mozilla/4.0 (compatible; esp8266 Lua; Windows NT 5.1)\r\n"
.."\r\n") end)
print(string.format("%d",report_data))
end
if bigger_aggregate_counter == 4 then
avg_z = bigger_aggregate_az_val/4
avg_y = bigger_aggregate_ay_val/4
avg_x = bigger_aggregate_ax_val/4
bigger_aggregate_ax_val = 0
bigger_aggregate_ay_val = 0
bigger_aggregate_az_val = 0
bigger_aggregate_counter = 0
end
aggregate_ax_val = 0
aggregate_ay_val = 0
aggregate_az_val = 0
aggregate_abs_ax_val = 0
aggregate_abs_ay_val = 0
aggregate_abs_az_val = 0
aggregate_counter = 0
end
print("d")
end
---test program
i2c.setup(0, sda, scl, i2c.SLOW) -- init i2c
i2c.start(0) -- start i2c
c = i2c.address(0, 0x68, i2c.TRANSMITTER) -- see if something answers
i2c.stop(0) -- stop i2c
if c == true then
print("Device found at address : "..string.format("0x%X",0x68))
else
print("Device not found !!")
end
c = read_reg_MPU(117) -- Register 117 – Who Am I - 0x75
if string.byte(c, 1) == 104 then
print("MPU6050 Device answered OK!")
else
print("Check Device - MPU6050 NOT available!")
end
read_reg_MPU(107) -- Register 107 – Power Management 1-0x6b
if string.byte(c, 1)==64 then
print("MPU6050 in SLEEP Mode !")
else
print("MPU6050 in ACTIVE Mode !")
end
write_reg_MPU(0x6B, 0) -- Initialize MPU, use 8MHz clock
write_reg_MPU(25, 199) -- Sample Rate = Gyroscope Output Rate / (1 + SMPLRT_DIV) >> 40Hz
write_reg_MPU(56, 0x01) -- Enables the Data Ready interrupt, which occurs each time a write operation to all of the sensor registers has been completed.
gpio.mode(8, gpio.INT, gpio.PULLUP) -- set gpio6 as input interrupt
gpio.trig(8, "up", new_data_interrupt) -- new data interupt handler
--read_MPU_raw()
tmr.alarm(0, 10000, 1, second_timer)
--tmr.stop(0)
In the configuration shown above the accelerometer outputs data at a 40Hz frequency and triggers an interrupt every time a sample is ready. We then simply aggregate the absolute value of each axis acceleration output (after removing its average value) and send it to Domoticz.
Fourth Small Project: Switching on Lights by Tapping on Furniture
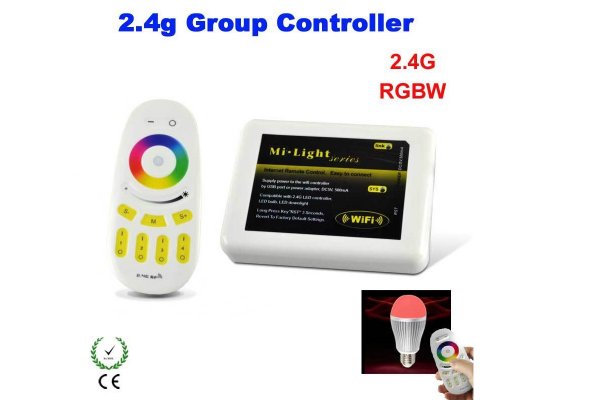
RGBW lamps like the one shown above are starting to be quite popular on websites like eBay, alibaba etc... They use proprietary 2.4GHz signals which were recently reverse engineered, allowing anyone to control them with an NRF24L01.
But if you're lazy like I was, you can also send UDP packets to the Wifi adapter that comes with them using a modified version of the script above and these 3 lines to switch on the lights when vibration is detected:
conn = net.createConnection(net.UDP, 0)
conn:connect(8899,"WIFIBRIDGEIP")
conn:send(string.char(0x47,0x00))
conn:close()
Just in case, I added a MAC filter on my router for that Wifi adapter. And if I'm not mistaken, the adapter doesn't receive signals on the proprietary 2.4GHz. You may find different UDP packets examples here.
Doing More with NodeMCU and Domoticz
As you can guess I've shown here basic examples of the capabilities of the NodeMCU + Domoticz combo. Domoticz allows much more complex actions using scripts which can be triggered by the output of your installed sensors.
In my case I'm only using the monitoring capabilities of Domoticz, even though its main purpose it to automatize your complete home!

Comments
Wow. This is sooo good.
I have always though that LUA would be the perfect language for this.
I am trying to interface the MPU6050 3 axis gyroscope + accelerometer using your code, I just need to print the values instead of sending them to the server so I remarked the code from line 104 to 114 but only the "d" gets printed.
I am not able to figure out what am I doing wrong.
@HB : Hello, what do you mean by remarked? removed?
Hello
Very good tutorial.
For us who first come into contact with Domoticz please explain:
YOURSERVERIP this is my static IP address?
Second Small Project: DHT22 Temp & Humidity Sensor how often sends data?
Thank you
@homerruma :thanks! yourserverip is indeed the server static ip address. for the second script, please have a look here: https://nodemcu.readthedocs.io/en/master/en/modules/tmr/#tmralarm